
While taking a break from writing, I’ve been sharpening my writing tools. Four weeks ago, my primary markdown editor was Featherpad . I still love Featherpad, and this amazing lightweight GUI text editor deserves its own article on discoverfoss.com . After I physically changed my workspace by adding a keyboard tray and a new keyboard, I don’t want to take my fingers off of the keyboard as I write because of the increased comfort. In a desire to keep my fingers on the keyboard, I turned back to vim as my primary writing tool.
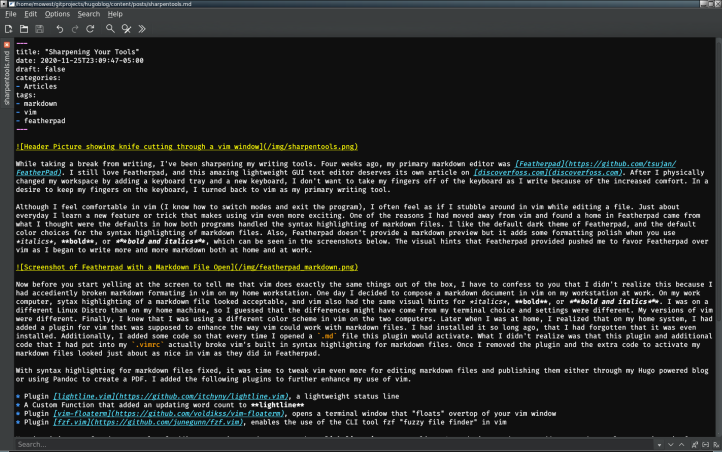
Although I feel comfortable in vim (I know how to switch modes and exit the program), I often feel as if I stubble around in vim while editing a file. Just about everyday I learn a new feature or trick that makes using vim even more exciting. One of the reasons I had moved away from vim and found a home in Featherpad came from what I thought were the defaults in how both programs handled the syntax highlighting of markdown files. I like the default dark theme of Featherpad, and the default color choices for the syntax highlighting of markdown files. Also, Featherpad doesn’t provide a markdown preview but it adds some formatting polish when you use italics, bold, or bold and italics, which can be seen in the screenshots below. The visual hints that Featherpad provided pushed me to favor Featherpad over vim as I began to write more and more markdown both at home and at work.
Now before you start yelling at the screen to tell me that vim does exactly the same things out of the box, I have to confess to you that I didn’t realize this because I had accidentally broken markdown formatting in vim on my home workstation. One day I decided to compose a markdown document in vim on my workstation at work. On my work computer, syntax highlighting of a markdown file looked acceptable, and vim also had the same visual hints for italics, bold, or bold and italics. I was on a different Linux Distro than on my home machine, so I guessed that the differences might have come from my terminal choice and settings were different. My versions of vim were different. Finally, I knew that I was using a different color scheme in vim on the two computers. Later when I was at home, I realized that on my home system, I had added a plugin for vim that was supposed to enhance the way vim could work with markdown files. I had installed it so long ago, that I had forgotten that it was even installed. Additionally, I added some code so that every time I opened a .md file this plugin would activate. What I didn’t realize was that this plugin and additional code that I had put into my .vimrc actually broke vim’s built in syntax highlighting for markdown files. Once I removed the plugin and the extra code to activate my markdown files looked just about as nice in vim as they did in Featherpad.
With syntax highlighting for markdown files fixed, it was time to tweak vim even more for editing markdown files and publishing them either through my Hugo powered blog or using Pandoc to create a PDF. I added the following plugins to further enhance my use of vim.
- Plugin lightline.vim , a lightweight status line
- A Custom Function that added an updating word count to lightline
- Plugin vim-floaterm , opens a terminal window that “floats” over top of your vim window
- Plugin fzf.vim , enables the use of the CLI tool fzf “fuzzy file finder” in vim
My vim-ninja son, found an example of adding an active word count to the lightline.vim status line. An updating word count adds tremendous value to using vim for most of my writing projects. For years, I have used word counts to help me gauge the length of my writing projects. I often have a target word count in mind before I begin either a work or personal writing project. For me a word count is like having a gas gauge for my writing. As I approach a certain number of words, I know that I need to bring my writing to a conclusion. fzf.vim gives me a fuzzy search window with a preview to open a new file into a vim buffer. vim-floaterm enables me to open a floating terminal window over top of the file I’m editing in vim. In this floating terminal window I can run my git and hugo commands to post a new article for discoverfoss.com , or to run the Pandoc command that will convert my new markdown document into a PDF for printing or distribution.
Besides adding these tools to enhance my use of vim as a markdown editor, I have also started to learn better some of the tricks that vim has built into the editor by default. I have learned to appreciate the quality of the vim spell checker, and have started to memorize its built in keybindings. I have rediscovered how easy it is to join lines together with the <Shift>+<J> while in Normal mode. This built in editor command helps me quickly clean up text that I have copied into vim from websites.
What FOSS tools are you using to get your work done? Would you benefit from taking some time to sharpening your understanding of that tool? Take that time. Having sharp tools can make your work even more enjoyable.
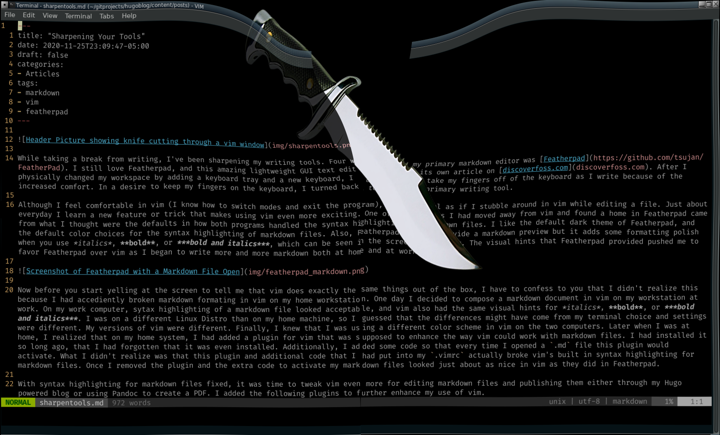
The header image for this article was assembled in Krita using a knife image provided by Alexander Lesnitsky over at Pixabay .